
Creating custom skins for games like Counter-Strike is an exciting venture, especially now that the landscape has shifted with the arrival of Counter-Strike 2 (CS2). If you’re curious about how to craft unique skins in this updated environment, you’re in the right place. The transition from CS:GO to CS2 has brought substantial changes—not just in aesthetics but in the entire workflow. So, how do you navigate this new terrain? Let’s explore the steps, tools, and mindset needed to successfully create skins in this modern era.
In this article, you’ll learn about the significant differences between the old and new systems, the tools you’ll need, and the process you should follow. Whether you’re a seasoned creator or a newcomer, understanding these updates is crucial. Ready to dive in? Let’s go!
Understanding the Shift: Why Old CS:GO Tools Are No Longer Effective
The previous methods of creating skins in CS:GO are outdated. Many creators still rely on familiar practices, but these can actually hinder your progress in CS2. You might feel tempted to revert to old habits, but doing so can result in broken files and frustrating experiences. So, what makes the new system different?
With CS2, the texture-compiling process has been streamlined. Rather than manually converting files, the new engine automatically handles this. This means you won’t need to deal with cumbersome legacy formats anymore.
The Obsolete Workflow: What You Need to Leave Behind
In the past, creating skins involved multiple steps, including:
These practices are no longer compatible with the updated CS2 engine. The new system is built to be user-friendly, allowing you to focus more on creativity rather than technical hurdles.
Do I Still Need Old Conversion Tools?
The short answer is: No. Attempting to use tools like VTFEdit will disrupt your workflow. CS2 has a native function that compiles images into a modern format called .vtex_c, eliminating the need for third-party converters. This simplifies the process immensely.
Getting Started: Accessing the CS2 Workshop Tools
To start creating skins, you need to enable the CS2 Workshop development tools. Forget about searching for obscure files online.
Here’s how to get set up:
- Right-click on Counter-Strike 2 in your Steam library.
- Select Properties and navigate to the DLC tab.
- Check the box to download the Workshop tools.
Once installed, you’ll see a prompt asking if you want to enter the Workshop development suite directly.
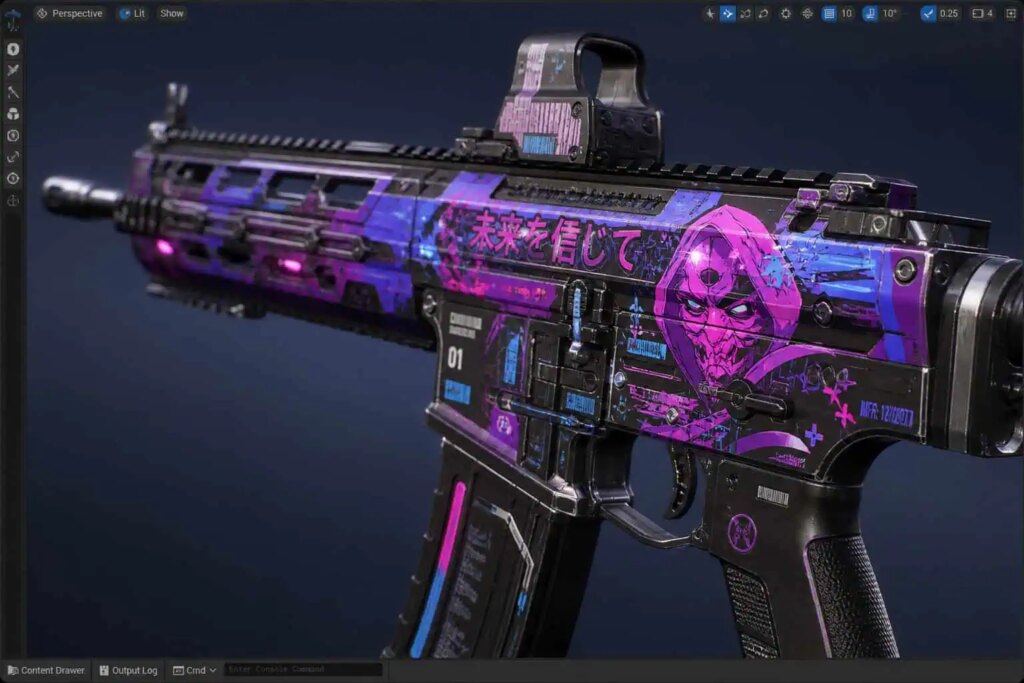
Preparing Your Design: Software and Base Models
While CS2 has made significant improvements, you’ll still need external software for actual design work. Tools like Photoshop or GIMP are great for creating your UV sheets.
When crafting your skin, you’ll need to:
- Start with a 3D model saved as an .obj file.
- Lay down your base colors.
- Create a UV texture map that wraps around the model accurately.
This foundational work is crucial in making sure your design comes to life in the game.
Utilizing Blender for Advanced Design
For those looking to take their skills to the next level, Blender offers advanced capabilities for preparing 3D models. You can visualize how different materials interact with light, which is essential for achieving realistic effects.
Transitioning to Physically Based Rendering (PBR)
One of the biggest shifts in CS2 is the move to Physically Based Rendering (PBR). This technology ensures that materials behave realistically under various lighting conditions.
In contrast to older methods where you simply applied flat colors, PBR allows your textures to react dynamically, creating a much more immersive experience.
To effectively use PBR, you’ll need to:
- Define material properties like roughness and metallic values.
- Create textures that reflect how light interacts with surfaces.
This attention to detail is what separates average skins from truly professional designs.
Testing Your Skins in Real-Time
Gone are the days of tedious testing through private servers. With CS2’s integrated preview environment, you can see how your design looks in real-time.
Simply click the preview button in the Workshop UI, and your skin will be rendered within the game’s sandbox. This feature allows for immediate feedback, making it easier to fine-tune your creations.
Publishing Your Designs to the Steam Workshop
After you’ve tested and finalized your skin, the last step is publishing it. The Workshop tools will package your file for community viewing.
This is how you can share your designs and receive feedback from other players. The process is straightforward:
- Wrap your item parameters and promotional images.
- Click publish to make your skin available for others.
Frequently Asked Questions
How do I create skins for CS2?
You’ll primarily use the Workshop tools available in the Steam DLC. Design your UV sheets using external software and compile your work using CS2’s native tools.
Can anyone become a skin creator?
Absolutely! Anyone can access the development tools through Steam. With a user-friendly interface, you’ll find it easier than ever to create your designs.
What if my custom skin looks off in-game?
This typically happens when PBR principles aren’t applied correctly. Make sure to define the material properties accurately for better results.
Why is the new toolkit better than the old methods?
The current toolkit provides an integrated environment for testing and publishing, eliminating the need for complex file edits and hacks.
How can I test my designs without private servers?
Just use the built-in preview environment in the Workshop tools. This allows for quick and easy testing of your designs in a live setting.
By following these steps, you’ll be well on your way to becoming a skilled skin creator in Counter-Strike 2. Embrace the changes, and let your creativity shine!

