Choosing the Right Software for Your Laser Engraver: A Comprehensive Guide
When you first dive into the world of laser engraving, selecting the appropriate software can feel overwhelming. You might find yourself excited to plug in your machine and start engraving, only to hit a wall when your software doesn’t communicate with it. Why is this happening? Often, the root of the issue lies in the compatibility between your engraver and the software you chose. In this article, we’ll explore the best software options available, focusing on their compatibility, features, and pricing, so you can choose the right one for your specific needs.
So, what software should you consider? We’ll cover three main contenders: LightBurn, LaserGRBL, and xTool Creative Space. Each of these programs has unique strengths that cater to different types of users. Let’s break it down.
Understanding Your Laser Engraver’s Controller: The Key to Software Selection
Before you can choose the right software, it’s crucial to identify the type of controller your laser engraver uses. Your options typically include:
Knowing your machine’s controller will simplify your software choice immensely. For instance, if your machine operates on a DSP controller, then LightBurn’s Pro version would be your best bet.
Diode Lasers and the grbl Family
Most diode laser engravers utilize grbl-style G-Code controllers. These machines are versatile and come in open-gantry and enclosed designs. For example, the Creality Falcon 2 Pro is a popular choice featuring a 60W output and a 400×400 mm work area. However, be mindful that these machines often face challenges during the initial setup, particularly with auto-detection.
CO2 Machines: The DSP and Ruida Controllers
If you’re using a higher-end CO2 machine, you’re likely working with a DSP controller, specifically the Ruida model. These machines generally feature a user-friendly control panel and usually connect seamlessly. The OMTech Pronto 60W, for instance, boasts a generous working area of 700 x 500 mm and is widely regarded for its ease of use.
The New Frontier: Galvo Fiber Machines
Galvo fiber machines represent the latest advancement in laser technology. While LightBurn has recently added support for these machines, it’s essential to verify compatibility with your specific model before making any commitments.
LightBurn: The All-in-One Solution
LightBurn is frequently hailed as the go-to software for laser engraving enthusiasts, combining design tools with machine control in a single application. Although it comes at a cost, the features it offers can justify the investment.
Cross-Platform Functionality
This software is compatible with Windows, macOS, and Linux, making it accessible to a wide range of users. Whether you’re operating a diode, CO2, or galvo fiber machine, LightBurn can connect easily via USB or network.
Built-In Design Features
LightBurn simplifies the design process by allowing you to import various file types, including SVG, DXF, and PDF. You can edit your designs directly in the software without needing to export and import them back and forth. This feature saves valuable time for creators.
Layer Management
The software’s layered approach allows you to group settings for engraving, shading, and cutting. Each layer can be color-coded for easier management, and you can adjust settings like speed and power as needed. This feature is especially beneficial for multi-step projects.
Pricing Breakdown and Trial Options
LightBurn isn’t free, but it offers a 30-day fully featured trial without watermarks. This is an excellent opportunity to explore its capabilities before committing financially. The pricing tiers are as follows:
The cost is a one-time investment, which can quickly pay off for those working on complex designs.
LaserGRBL: The Free Option for Simplicity
If you’re just starting out or working with a tight budget, LaserGRBL is a free, open-source option that runs solely on Windows. However, it’s essential to note that it has limitations.
Basic Functionality
LaserGRBL only allows for one speed and one power setting per job. This means that if your project involves engraving and cutting, you’ll need to create separate files for each operation. While it’s a good option for simple tasks, it may not suffice for more complex projects.
Design Limitations
For design work, you’ll likely need to use an external program like Inkscape to prepare your files, which can be cumbersome for some users. Therefore, if you plan to work on multi-layer projects often, you might find LaserGRBL lacking.
xTool Creative Space: When Bundled Software Shines
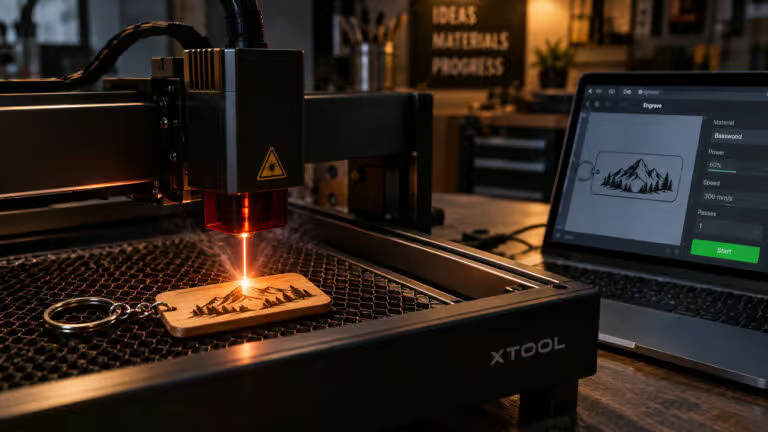
For those using xTool machines, the bundled xTool Creative Space software offers an impressive array of features. It comes with a wealth of material profiles and even generative AI art tools, making it a robust option for users.
Feature-Rich Environment
The xTool Creative Space includes over 300 material profiles and various test arrays, which can be a game-changer for your projects. While LightBurn can also control xTool machines, you might lose some of the unique features that xTool Creative Space provides.
Understanding Speed, Power, and DPI Settings in LightBurn
When using LightBurn, you’ll find that speed, power, and DPI settings are managed through the Cuts and Layers window. Each layer acts as a container, allowing you to customize settings for different operations.
Why Layers Matter
It’s crucial to understand that layers in LightBurn are not visual stacks like in Photoshop. Instead, they serve as settings containers that execute from top to bottom. For example, if you want a fill operation to occur before a cut, you’ll need to reorder the layers accordingly.
Starting Points for Material Settings
If you’re working with wood, you’ll want to start with specific speed and power settings based on your material type. These initial settings can significantly affect the quality of your engravings and cuts.
File Preparation: Engraving vs. Cutting
Another vital aspect is how you prepare your files. The distinction between engraving and cutting is established when you import your files into the software. Only vector files can be cut, while bitmaps like PNGs can only be engraved.
Common Issues with PNGs
If you find that your PNG won’t cut, it’s likely due to the nature of the file format. You’ll need to either trace the image to create a vector path or redraw it entirely.
Setup and Connection Issues: Troubleshooting Tips
First-time setup can sometimes lead to hurdles, especially if your software fails to recognize your machine.
Common Setup Failures
The most frequent issues are often related to missed drivers or faulty cables. Ensure you follow all setup instructions closely and check your connections if you encounter problems.
Pre-flight Checklist
Before you start engraving, always double-check your machine’s settings and perform a framing preview. This will save you time and materials by ensuring your job is set up correctly.
With this guide, you should be well-equipped to choose the best software for your laser engraving needs. Whether you opt for the comprehensive features of LightBurn, the simplicity of LaserGRBL, or the specialized tools in xTool Creative Space, understanding your machine and its requirements will help you make an informed decision.